Wednesday, August 3, 2016

Wholesome with wholewheat!

Decadent is the word we associate with lot of baked creations. Which they are, mostly. But this post is about something not so rich. It is about something you would call wholesome, healthy, scrumptious and non-baked! Whole wheat Banana Pancakes!


Whole wheat Banana Pancakes

Every once in a while I prepare pancakes for breakfast, from scratch. We love our pancakes. It's like having a treat at breakfast. Also, I enjoy the process of making them. Measuring and whisking and finally watching the pancakes fluff up on the frying pan.
But my recipe for original pancakes uses all purpose flour. Not a very healthy option for a meal, I know. So, although that recipe is a keeper, which I might share on this blog in future, I was looking for a healthier version.

This recipe was perfect because it uses whole wheat flour. And bananas. Banana-anything is welcome at our home. And Cinnamon. I love the combination of bananas and cinnamon. You can view the original recipe here.


Whole wheat Banana Pancakes

For the pancakes to rise and get their trademark thickness you need some rising agent amongst the ingredients. Most of the pancake recipes I have come across use eggs and baking powder. Loads and loads of baking powder for one breakfast I say. Quantity enough to make one 8" round pound cake. Why not use the egg white meringue power instead to make the pancakes fluff up, I thought. So I have reduced the baking powder by half and whipped the egg whites to stiff peaks to get thick pancakes. A hand mixer comes handy for this purpose, though two egg whites can be easily whipped by hand.

I added a tablespoon or two of sugar to the batter. You can omit it if your bananas are very sweet. May be next time I will go for brown sugar. It would give a beautiful flavour too. Yum!

Whole wheat Banana Pancakes

If you are looking for healthy, tasty and guilt-free option for pancakes, these are it. Hope you would give these a try. Here's the recipe:


Whole wheat Banana Pancakes

Yields 10-12 pancakes.

Ingredients:

1 1/2 cups Whole wheat flour/ atta
1/2 tsp Baking powder
1/2 tsp Cinnamon powder
1 pinch of salt
2 Bananas, ripe or overripe
2 Eggs, separated
1 tsp Vanilla extract
1 Cup Milk, room temperature
3 Tbsp Butter or Ghee, melted
1 - 2 Tbsp sugar

Steps:

Mix the dry ingredients in a large bowl. This is the bowl in which you'll be preparing your batter.

In a separate smaller bowl mash the bananas. Add egg yolks, milk, vanilla extract, melted butter and sugar. Mix and set aside.

Whip the egg whites to stiff peaks using a whisk. A hand held mixer would do this job in less than two minutes.

Pour the wet ingredients into dry in 2-3 batches, stirring just until mixed. Fold the whipped egg whites into the batter in two additions.

Heat a skillet/fry pan. Pour about 1/4 cup or ladle full of batter in the pan. Let it cook on medium flame till bubbles appear on top and the edges of the pancake become dull and loose their shine. This is an indication that the pancake is done at the bottom. Flip the pancake and let cook on other side for 1-2 minutes.
Serve warm.

Serving suggestions:

Serve the pancakes warm with honey, fresh fruits, fresh fruits, whipped cream or even Nutella. Kids would love these studded with some chocolate chips.


Happy Cooking!
Shwe

Monday, February 29, 2016

Choco bliss: a bite at a time

Happy Leap day!
I have been meaning to share a couple of recipes this past month but haven't been able to do so. Well, starting this year I wanted there to be at least one post per month. 2-3 would be better, 4-5 would be great! Alas, we don't get to live in dreamland. But life, on Earth, does give you small yet meaningful gifts including an odd extra day every couple of years. Today morning when I was sulking, thinking 'There goes my resolution regarding this blog', I realized all is not lost! And here I am trying to make the most of the '28 dino pe ek din Free!' offer.

Chocolate cookies

On to today's recipe. Chocolate cookies. Yup, nothing fancy, nothing extravagant, no frosting or decoration. Simple chocolate cookies. Simple, yet divine. And eggless.


Chocolate cookies

These cookies are easy to put together and the prepared dough can be stored in refrigerator for about a week. So you can have fresh baked cookies whenever you have a craving. The dough needs to be refrigerated for at least 30 minutes before baking. Refrigerating the dough stops it from spreading too much while baking which yields thicker cookies. You can either shape the cookies immediately, refrigerate them for half an hour and then bake. Or do it the way I did, shape the dough in two logs roughly 1 1/5" in diameter, wrap them in plastic wrap and refrigerate the logs. Then when you want to bake, just unwrap the logs and cut cookies of equal thickness and bake. When doing it this way, ensure that there are not air pockets in the wrapped dough bundle, or the dough becomes dry and the cookies will be very brittle and dry. 


Chocolate cookies

The original recipe is by Nigella Lawson, from here. I find Nigella's recipes a bit rich for my taste and I tend to tweak them a little to get results of my liking. But I haven't tweaked this recipe except for adding some vanilla extract. There was this one time when I even replaced some of the flour with equal weight of ragi flour. The results were equally great. The original recipe calls for a chocolate glaze. I found the cookies scrumptious on their own so I omitted the glaze.

Chocolate is the prominent flavour in this cookie which we get from the cocoa powder, so use the best quality cocoa powder you can get. I used Nilgiri's cocoa powder. 


Chocolate cookies

I have baked these cookies numerous times since last Christmas; they don't last longer than 2-3 days. That is how good they are. I even earned a thumbs up from my kiddo. I hope you will try it out.

Here's the recipe.


Chocolate cookies


Ingredients:


1 cup + 2 Tbsp, 250g butter, room temperature
1 cup, 150g powdered sugar, not icing sugar
1/3 cup, 40 g cocoa powder
1 tsp vanilla extract
2 cups + 2 Tbsp, 300g all purpose flour
1 tsp baking powder
1/2 tsp baking soda


Steps:


Preheat the oven to 170°C. Line a cookie baking sheet/tray with parchment paper or baking paper. It helps if you have two sheets so that one sheet can cool while the other is in the oven. If you have only one baking sheet, just let it cool down to room temperature before you bake the subsequent batch.

Cream the butter and sugar till the mixture is fluffy and light in color. Add the vanilla extract and mix.

Sift the cocoa powder. Add to the butter mixture and mix till evenly combined.

Sift the flour, baking powder, baking soda and a pinch of salt. Add the dry ingredients to the butter mixture in 2-3 batches. Mix till combined. The dough will be a bit sticky.

Apply some butter or ghee to your palms and roll the dough into 1 to 1.5" round balls, flatten them slightly and place on the baking tray. Try to get all the balls of same size. This ensures that all cookies in a batch are evenly baked. These cookies spread so do not crowd the baking tray. Keep 1" gaps. Place baking sheet in refrigerator for 30 minutes.

Place the baking sheet in oven and bake for 10 - 12 minutes. The time will vary by 2-3 minutes based on the size and thickness of the cookie. The cookies will be soft when you take them out of the oven, but they will harden once cooled. Baking a small batch of 2-3 cookies to find the baking time is always better.

Let cookies cool on the baking sheet for 5 minutes, them keep them on a cooling rack, a flat sieve (channi/chaalni) works too. Once the cookies are completely cool, keep them in an airtight container.


Happy Baking!
Shwe

Saturday, January 23, 2016

"Best of Luck" Brownies

This post is like one of those movies that gets released before other movies which are much ahead of it in the release-date pipeline.


That happened because I was in a hurry; in a hurry to bake a brownie, a fudgy brownie mind you and in a hurry to try out ragi flour in brownies and most importantly to bake these for a cousin who loves chocolate anything and is appearing for her board exams this year. So, many reasons for this film post to be released published before another one which is waiting for it's final edit.


'Why ragi?' you may ask. Ragi or finger millet or nachani is a rich source of calcium, amino acids and fibre. In some regions of southern India, it is used to prepare many dishes like dosa, mudde(steamed balls), porridge etc. Its flour is brownish in color and that tempted me to use it in chocolate flavoured baked goodies. I have tried ragi earlier in chocolate cookies and cakes and the results were great. So, I thought why not try it in a fudgy brownie.

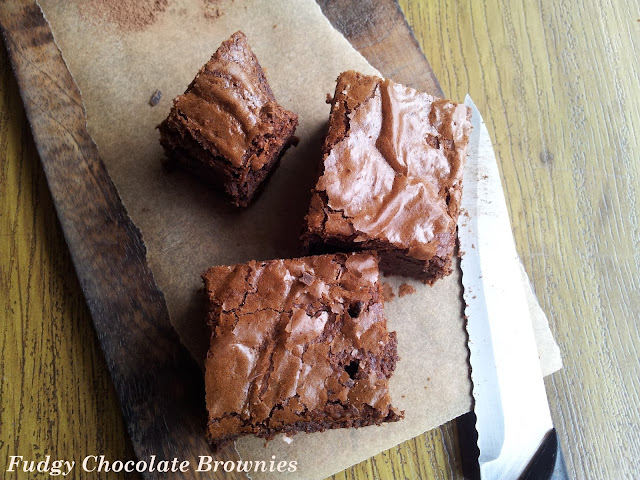
I am not a big fan of 'healthy' desserts, wherein the original flavour or texture of the dessert gets marred by the healthy ingredient. But if the dessert is able to retain its expected form, texture and taste, I am all for it. And, I think brownies don't care about what flour you use in the batter. And who would when there's so much of chocolate in it? Loads of chocolate!


Apart from substituting some ragi flour for all purpose flour, I changed the amount of sugar too. I have reduced the amount of sugar since the chocolate I used was semi-sweet. Amul dark chocolate would fit perfectly here. Also I added small amount of baking powder.
The square pan I used was 8"x8" and it yielded 1.5" thick brownies. I feel that a 9"x9" pan would yield slightly thinner brownies. And thinner is how I would prefer them because these are really rich brownies. The original recipe is here.

Oh rich they are! Rich, sinful and full of chocolatey goodness. Not for the faint-hearted I say. If you love chocolate, I suggest you try these.

Here's the recipe.

Fudgy Chocolate Brownies


Ingredients: 

5 oz butter, room temperature 
3/4 cup (150 gm) sugar, powdered 
2 eggs 
7 oz semisweet chocolate, chopped 
2/3 cup (96 gm) all purpose flour (I used 80 gm All purpose flour and 16 gm ragi flour) 
1 Tbsp (6 gm) cocoa powder 
1/4 tsp baking powder 
1 pinch of salt 
1 tsp instant coffee powder 
2 tsp warm water 
2 tsp vanilla

Steps:

Preheat oven to 180°C. Grease, line a 8" square baking pan. Keep length of the paper such that some of it hangs over two opposite edges of the pan. This helps remove the brownie easily. For 8" square pan, cut paper of 8"x14".
In a small bowl mix together the warm water and coffee granules, set aside.

Put chocolate in a pan and keep it on a double boiler to melt it. Once melted, set aside.
You can do this step in a microwave too, just keep a close watch and do it in small bursts of 10-15 seconds, stirring after each time.

Whisk together the cocoa powder, flour, ragi flour (if using), baking powder and salt. Set aside.

Cream the butter and sugar till fluffy, about 3-4 minutes. Add eggs one at a time and mix properly. Add vanilla and coffee mixture. Mix till combined.

Add the warm melted chocolate and mix. Add dry ingredients and mix just till combined.

Spread the batter in prepared pan and level the top using a spoon. Bake for 35-40 minutes. Check for doneness 32 minutes. The toothpick or skewer should come out will some moist crumbs sticking to it but not wet batter. Once baked, remove from oven and let cool in pan 10 minutes.

Remove from pan by lifting the over-hang of paper lining that we kept. Cut into bars and enjoy!
For cleaner cuts and easier handling, refrigerate the whole brownie slab for 1 hour and then cut into pieces.


Happy Baking! 
Shwe

Friday, January 1, 2016

Ringing in the new year....

Happy new year, dear readers!


This new year, I start by bringing to you this very special Christmas fruit cake recipe. I cannot boast of a favourite family Christmas cake recipe which has been passed on from previous generations. So, I thought, I get to choose/discover one of my own!

I love the Christmas fruit cake, or plum cake as it is called in southern India. I have been trying different recipes over past couple of years. And this time around I can proudly say that I nailed it. Well, I found what I was looking for. A fruit-rich, moist, dark and flavourful christmas cake. It is easy and quick too.

I watched couple of videos and read couple of recipes before finalising the recipe. The main inspiration for the recipe is the Easy Fruit Cake by Stephanie of Joy of Baking. This cake is also called 'Boiled fruit cake' because the fruits are cooked in a mixture of sugar, water and spices. It aids the fruits to soak in all the flavours. This is a good news for those who did not soak their fruits in advance, this recipe doesn't call for it!


The recipe does not contain too many spices. Just three of them, which can be easily found in any Indian kitchen. For dry fruits, I used a combination of raisins, cranberries, prunes, apricots. Prunes add a lot of moistness to the final cake. You can also add chopped nuts like almonds, cashews, pistachios. The last time I used walnuts, they tasted bitter in the final cake. So I skipped it this time. The amount of fruits is slightly less that the original recipe. For candied fruit, I used candied papaya (tutti-fruiti) and candied karvanda/karonda. I didn't have candied orange peel at hand so I used orange zest instead.

I added a small amount of cocoa powder to boost the dark color I was aiming for. But I think the major ingredient which lends to the color is dark brown sugar. I replaced some of the water with rum. You can also use other alcohol like brandy, grand mariner etc. Or you can skip it completely like the original recipe. And for those who do not use egg, I think ground flaxseed can be used to replace it.


Also, no special equipment is called for. Just few pots and a large spoon to stir. So, a lots of plus points. What are you waiting for? Bring out your dry fruits and spices and get going! Here is the recipe.

Christmas fruit cake

Ingredients:

2/3 cup (140 gm) demerara sugar or dark brown sugar, firmly packed
1/3 cup (70gm) white granulated sugar
1/6 cup (40ml) rum
5/6 cup (200ml) water
1/4 cup (57 grams) butter
1/2 tsp ground cinnamon
1/2 tsp ground cloves
1/4 tsp ground ginger
2 pinches of salt
1 Tbsp cocoa powder
250 grams mixed dry fruits like raisins, cranberries, figs, prunes, apricot
Zest of one orange / kinnow / malta orange

2 large eggs, lightly beaten
1 1/2 cups (195 grams) all-purpose flour
1 tsp baking soda
1 tsp vanilla extract
slightly less than 1 cup (125 grams) candied raw papaya (tutti-frutti for those in India) and karvanda/karonda

Steps:

Preheat oven to 180°C. Grease, line and dust the baking pan(s). Makes a large loaf and a mini loaf or one 9" round cake. Set aside.

Whisk together the flour and baking soda, set aside.


In a large saucepan or a heavy bottomed pot, put the sugar, rum, water, butter, spices and dry fruits. Mixed candied fruit will be added later. Over medium heat, bring this mixture to boil. Stir occasionally. Let simmer for 5-8 minutes, then remove from heat and let cool till lukewarm.


Add slightly beaten eggs to this mixture and mix well.

Add vanilla and flour mixture and mix. Stir in the candied fruits/peel.

Pour the batter in prepared pan and level the top and place it in the oven for baking.

It will take 25-28 mins for a mini loaf, 35-40 mins for a regular 9"X5" loaf and 50-55 mins for a 9" round. Test using a toothpick around 5 mins prior to above mentioned baking time.

Once done, remove from the oven. Cool the cake in cake pan for 10 minutes. Turn it out onto a wire rack. Let cool completely.


Although this cake can be consumed immediately, I suggest to let it rest at least overnight for the flavours of mature. If storing for more than a week, wrap it in cling wrap and store in a cool and dry place.

Enjoy with a hot cup of coffee or a shot of rum!

Happy Baking!
Shwe


P.S. : Regarding the long absence of posts on this blog, well, "What are new year resolutions for?!" I say.
May you stick to your resolutions this new year.

Happy New Year, again!

Wednesday, July 9, 2014

Oats for breakfast, Honey!

Breakfast is one meal that we never skip, but we don't have time to fuss about preparing it either. So we eat cold breakfast, mostly cereals, mostly locally grown like raagi (finger millet), popped raajgira (amaranth), popped jwari (jowar) flakes, sattu. Oats somehow never found a place in the breakfast menu. Mainly because it needs to be cooked which means hot milk and hot milk is a big no-no. 
So, this is the first time I have ever used oats in my kitchen, ever, yes that's surprising. And it's happy I am that I baked these muffins!


In India almost every lady of our previous generation cooks well and has couple of aces up her sleeves. But there are very few I know who bake. One among them is my aunt. She is an inspiration as a cook, as a baker and above all as a person. It is she who suggested me to try out oats as an ingredient in baking, that had me promptly buying a packet of instant oats. 

Now all I wanted was a recipe! I stumbled upon it when my sister-in-law pointed me towards this food industry event which was to happen in Bangalore. And one link led to another, and a lot of clicks later I found this recipeThese are filling, breakfast or snack-time muffins.


The recipe calls for very little bit of mixing. The batter comes together very quickly, once you have all the ingredients ready. I have used vanilla sugar, you can use plain granulated sugar. Adjust the quantity of vanilla extract accordingly.

Buttermilk can be substituted with 1/2 cup of milk plus 2 teaspoons of curd, set aside for 15 minutes. Since I make butter/ghee at home, there's always some frozen buttermilk around. 

As the name suggests, these are breakfast muffins, so I wanted to add some dry fruits or nuts. My li'l one fancies raisins so I added soaked raisins. When given a choice between chocolate chips and raisins as an ingredient of these muffins, he chose raisins without any qualms.

But the one ingredient you don't want to skip is cinnamon. Don't skimp. I would go so far as to suggest to increase it to 1/2 teaspoon while you are at it. While the muffins bake the aroma of cinnamon fills your home. Heaven!


When making cupcakes or muffins, if presentation is not a big concern, I prefer silicone moulds over paper liners. Mainly because they don't need any prep but more because I am a bit reluctant to loose even tiny of those scrumptious crumbs sticking to the liners.

These muffins are best served warm with a glass of milk or a hot cup of tea. The stress is on warm! Here's the recipe:

Whole wheat oat and banana muffins


Ingredients:


1 cup whole wheat flour
1 cup instant oats, measured then coarsely ground
1 tsp baking soda
1/4 tsp ground cinnamon
1/4 cup + 2 Tbsbs vanilla sugar
3-4 small bananas, mashed (about 1/2 cup heaping)
1/2 cup buttermilk
1 egg
1/4 cup + 2 Tbsbs vegetable oil, sunflower/canola/olive
1/4 tsp vanilla extract (use 1/2 tsp if using plain sugar)
1/4 cup raisins, soaked

Steps:


Preheat the oven to 180°C.

In a large mixing bowl, mix flour, ground oats, baking soda, cinnamon and vanilla sugar using a whisk. Set aside.

Mash the banana in a small bowl. Beat in the egg. Add remaining wet ingredients to the banana mixture.

Add wet mixture to dry one in 2 batches. Mix till just combined or till no dry streaks of flour remained. 

Add in the soaked raisins and mix. The batter will be thick. 

Spoon the batter in muffin moulds/pan. Smooth the tops.
Bake for 15-18 minutes. The top of the muffins may crack. Check if done, using a toothpick. Be careful not to over bake else they muffins will turn dry.

Once done, set them to cool. Store in an airtight container once completely cooled.

Tweaks:

- You can replace 2 tablespoons of oats with same quantity of rava (semolina) for added crunch.
- You can add chopped, roasted nuts.
- You can use brown sugar instead of granulated white sugar. Gud/jaggery can be used too, increase the quantity as gud is less sweet than same quantity of sugar.
- You can sprinkle granulated sugar on top of the muffins, before baking.
The options are many!

Happy Baking!
Shwe

Sunday, April 20, 2014

One-year blogiversary and some food thoughts...

This blog has turned one and we are celebrating our first blogiversary! I never thought I would use that word, not that I didn't intend the blog to turn an year old. There are still tons of recipes I want to try, hundreds of them I want to share with you. Here's a slice of the one I will be sharing in this post:


It's fun, the whole process of writing a post. Starting with baking and tasting a recipe, then taking pics and then finally wrapping it all up in a fun-photo-recipe package. 

The last I counted, there were seven recipes that I have posted. But I will take this opportunity to mention that I bake way more than what I post and my notebook is full with lots of scraps of papers, chocolate wrappings, paper cuttings stuffed inside it. All containing recipes I am yet to try, notes I am yet to share.

Over the last couple of years, I have learnt baking from books, people's experiences, food shows even. But my largest source is the Internet, more specifically the "blogoshpere". And you will find a varied variety of people in that space. Some are bonkers awesome! Some are total geeks! Some are passionate and elegant! Some are humble and helpful! Some are legends! (View the links and you will know) I can go on and on.

Also a couple of years back I came across this group on facebook called the Home Bakers Guild or HBG as they call it. It is a very active group comprising of professionals, bakers running business from home, hobby bakers and newbies. A bunch of enthusiastic, crazy and helpful people baking their hearts away. It is awesome and inspiring!


In this post, I present to you this flavourful and moist pineapple upside-down cake. I have baked this cake thrice, each time with a different recipe. I will be sharing the one I liked most.

It is called upside down because it is baked with the pineapple at the bottom and once done baked, it is turned upside down and we get to see it in its full glory. The brown sugar gets cooked into caramel, pineapple absorb its slightly burnt flavour and cinnamon adds a beautiful note to the overall taste.


Caramel, juicy-sweet-tangy pineapples and a super moist cake which absorbs the flavours of caramel and pineapples. It cannot get any better!
Here's the recipe:

Pineapple Upside-Down Cake


Ingredients:


Topping
1/4 cup butter, melted
3/4 cup packed brown sugar
8 slices of pineapple, cored

Cake
1 1/2 Cups All-purpose flour
1 1/2 tsps baking powder
1/4 tsp salt
1/2 tsp cinnamon powder
2/3 cup sugar
1/2 cup butter
2 eggs
1 tsp vanilla
3/4 cup milk

Steps:

Preheat the oven at 175°C . Grease a 8" or 9" round pan heavily. 

Pour the melted butter in the pan. Spread the brown sugar evenly on top the the butter.
Cut pineapple in thick slices. Remove the core. If using canned pineapples, drain the juice and pat the slices dry using paper towels.
Place the pineapple slices on top of the sugar. Pack them as close as possible because they shrink while baking.

Sift together all of the dry ingredients except the sugar. Set aside.

In a large bowl cream together butter and sugar, for 3-4 minutes, till light and fluffy. Add eggs one by one, beat well after each addition. 

Add vanilla and pineapple essence, if using. Mix.

Add milk and dry ingredients alternately in three batches, starting and ending with flour. Mix just till combined.


Spread batter on top of the pineapples. Tap the pan on the counter once to release any trapped air pockets.
Place the pan on a baking tray or cookie sheet. Bake for 45-50 mins or till a toothpick or knife inserted in cake comes out clean. Be careful not to dip the toothpick too deep else you will hit the caramel.


Once done, take the cake out of oven and let it cool in pan for 10 mins.
Turn it out onto a plate. Serve warm.

It there are any pineapple pieces sticking to the bottom of the pan, just lift them and place back on the cake.

This cake was worth every anxious moment spent while unmoulding and flipping the cake upside-down. I hope you will give it a shot!

Happy Baking!
Shwe

Thursday, April 10, 2014

Last but not least, a spiffed up Birthday Cake


Picking up things from where I left last, we were celebrating the 'birthday season' during November. The season ended with Hubby's and Master Ts' falling just days apart. And birthdays mean cake. Not one but two!


Master T turned two in November! He celebrated his birthday with friends at playschool. For the celebrations there, I baked vanilla chocolate marble cakes, yes plural. It was fun to see li'l ones asking for a second serving.

For the party at home I wanted a different flavor for the cake, no more chocolate! Also look wise a spiffed up one. Then there was this vanilla buttermilk cake recipe I wished to share with you. And some strawberry crush with whole strawberries I had been waiting to use. Also T's maushi had gifted me some candy cake decorations from Wilton. I put all these ideas together and that lead to this awesome cake.

It was fun to watch people's reaction on seeing the cake. 'Wow!', 'It's great!' , 'It's a tall cake!' . And tall it was and it awed you. But only till you lifted it. I was deceptively heavy! And it vanished from the plates in a jiffy. 


The cake has four layers of vanilla buttermilk cake. The recipe is inspired from Deb's blog here. This cake is a keeper, light and moist. I have baked it a couple of times and I was pleased with the result each time. I was waiting for an opportunity to use it in a layered cake and this one seemed perfect. The only major change from the original recipe was amount of baking soda used.

Two tips to get this cake perfect: one, cream the butter-sugar mixture for good 3-4 minutes. And second, refrain from stirring too much while mixing flour and buttermilk. Take the sentence 'Mix just till combined.' literally. You have to mix the batter just till you stop seeing dry flour in it. Any more mixing you do helps in creating gluten which leads to a hard chewy cake. Trust me that is not something you want.


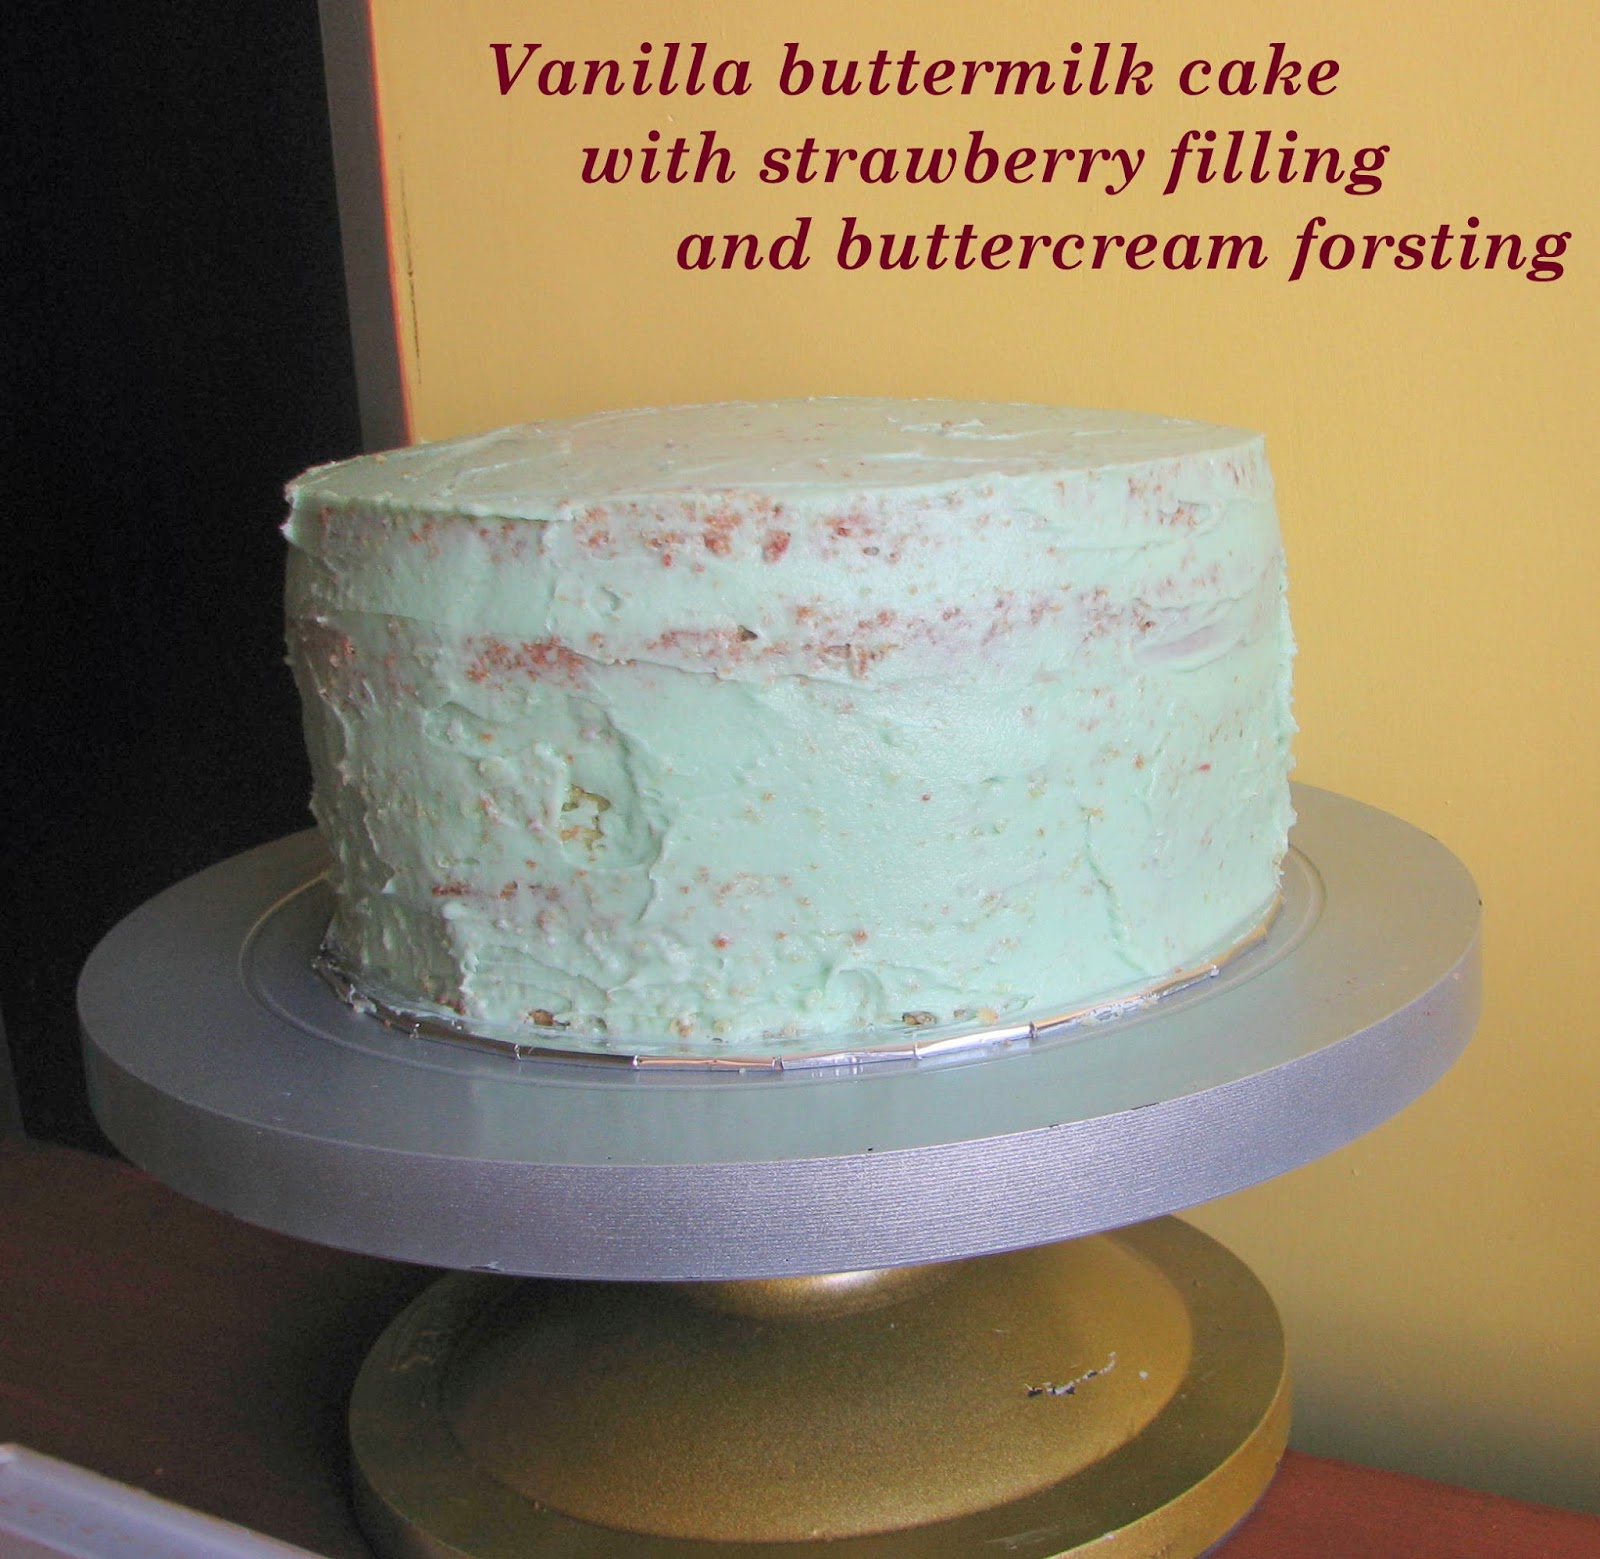
For filling the cake I used strawberry puree and strawberry buttercream. For frosting the cake I followed a simple buttercream recipe. I think I will go for Swiss meringue buttercream next time. I tinted the outer frosting slightly with blue gel color. Use a toothpick to pick the color from the bottle. The amount of color will seem teeny-weeny, but that's as much as you want. A bit goes a long way. The butter I used was yellow in color and hence the buttercream turned sea-green instead of blue. 

As much as I love baking cakes and experimenting with new recipes and ingredients, my skills in terms of frosting and decorating them are very limited. It takes loads of practice they say. And loads of buttercream too, I add. This cake was frosted in three steps, layering+filing, crumb coating and final frosting. For the final touch I decorated using ready-to-use edible cake decorations by Wilton.


I was happily surprised looking at my creation. The delicious cake was worth the hours spent on planning, baking, frosting and keeping master T from licking the frosting.
Here is the recipe:

Vanilla Buttermilk Cake with Strawberry filling and Vanilla buttercream 


Ingredients:

Cake
4 Cups + 2 Tbsps Cake flour*
2 Cups sugar, powdered
2 tsp baking powder
1 tsp baking soda
1/4 tsp salt
4 eggs
1 Cup butter
2 Cup buttermilk**
1 1/2 tsp vanilla extract
1/2 tsp strawberry essence

Buttercream
1 Cup (227grams) butter
4 Cups (460) icing sugar
1 Tbsp vanilla extract
2 Tbsps cream or milk
4 Tbsps strawberry puree

Strawberry Puree
1 cup store bought strawberry puree
or pulse strawberry crush in a blender

Steps for preparing cake:
Preheat oven to 175°C. Grease, line and dust two 8-inch round baking pans. Set aside.

Sift together all of the dry ingredients except the sugar.  Set aside.

In a large bowl cream together butter and sugar, for 3-4 minutes, till light and fluffy. Add vanilla and strawberry essence, mix well.

Add eggs one by one, beat well after each addition.

Add buttermilk and mix. The mixture may curdle but it will all come together once flour is added.

Add flour mixture in 3 batches. After each addition, mix just till combined.

Spread batter in prepared pans. Tap the pans on the counter once to release any trapped air pockets.
Bake for 30-35 mins or till a toothpick or knife inserted in cake comes out clean.


Once done, take the cake out of oven and let it cool in pan for 10 - 15 mins.
Turn it out onto a wire rack. Let cool completely.
Before frosting or decorating this cake, refrigerate it for at least an hour.


*Cake flour is similar to All-purpose flour but it is lighter in weight and has lower protein content. This results in more soft and tender cakes.
Substitute 1 cup of cake flour with 3/4 cup of All-purpose flour and 1/4 cup cornflour/cornstarch.
For this cake, I used 3 cups All-purpose flour + 1/2 cup of cornflour instead of the given amount of cake flour.

**Buttermilk is the liquid left behind after churning butter out of cream.
For substituting 1 cup buttermilk, take about 2 tablespoon plain curd in an 1 cup measuring cup and fill the rest with milk. Let it set for 15-20 minutes and then use it in place of buttermilk in above recipe.

Steps for preparing buttercream:
Frosting:
Cream butter till fluffy. Add sugar in 1/2 cup batches and mix well.
Add vanilla, mix well. Add cream, starting with 1 tablespoon to get desired consistency.
You can make half a batch of this and make more if required.

Filling:
For strawberry flavoured buttercream, add strawberry puree along with vanilla while mixing.

Assembly:
For assembling this cake, I highly recommend using a turn table. But we can also use a tall dabba/round tin to raise the cake to comfortable height.

Have your serving plate or cake board ready.

Cut each cake horizontally in two layers using a long serrated knife or a bread knife.

Put a small amount, about 1/2 teaspoon of buttercream in the center of the cake board or serving plate. This stops the bottom layer from sliding around while we frost the cake.

Place the bottom layer of one of the cakes on the serving plate/cake board.
Spread about 3-4 tablespoons of strawberry puree on this layer.
Place the top layer of the same cake on the puree. Dollop about a third of the strawberry frosting on top. Spread the frosting leaving about one-fourth of an inch margin around the edge. The margin is to avoid frosting from oozing out when the next layer of cake is placed on top.

Place the second top layer of a cake on top of the frosting. Spread some strawberry puree on top of this. Place the last remaining bottom layer of a cake with the bottom side facing up. This is to get a smooth top.

Taking small amounts of buttercream, spread it around the sides and top of cake. This is called crumb coating, to seal-in the crumbs. 
Refrigerate the cake for 30 mins for the frosting to set.

Now frost the sides in back and forth strokes using small amount of frosting at a time. Dollop the remaining icing on the top of the cake and spread it evenly. 

Using my small offset spatula, I drew vertical strokes on the sides while turning the turn-table constantly. On the top of the cake I made kind of spikes, again using the offset spatula.

I hope you will give the recipe a try or at least some parts of it or a scaled down version of it.

Happy Baking!
Shwe